9.29.2008

A little glimpse of Christmas-ness...

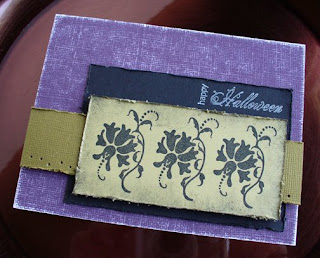
Hello hello! Tonight I'm going to share with you, the project I taught at the Gardner Stamp Club meeting last Thursday, which was a catalyst for my Boo Tri-fold card from the previous post. It is a Christmas version of the Fold-Over Treat Envelope project shown on page 123 of The Angel Company's Fall/Winter 2008 catalogue. This is VERY quick & easy, and the instructions are spelled out for you in the catalogue, so I won't do step-by-steps tonight. I will say that the recipe calls for the top 2-3/4" of a paper lunch bag, and I also used a 1-1/2" strip for an accent.


Stamps: Sweet Goodies, Joy of Christmas, Going Abroad
Paper: TAC's Dark Green & Scarlett carstocks, & the top portion of a paper lunch bag
Ink: Jardin Moss & L'Amore Red Palettes and VersaMark
Coloring medium: Tombow markers
Other: pop dots, Fiskars Waterfall border punch, Yes! glue

The Yes! glue is perfect for adhering the bag to the cardstock. It doesn't wrinkle the paper & it doesn't show through like a bead of glue or adhesive would.

Yep... very simple, but fun, project! The thing that took the longest? Cutting out that little holly element! [groan]

I'm thinking this project would be nice for those dreaded gift cards that seem to be taking over the gift-giving as of late. I soooooooooooo miss the beautiful wrappings that I used to give/receive back in the day :(

[cue music: 'Memories... light the corner of my mind...']

Oh! Real quick... I made my first Etsy sale last night!! I listed that trio of Halloween cards from a few posts back, and they sold in under 2 hours! I shipped it off today and am now totally psyched to list more! I did take some more photos tonight after work, so I'm off to work on that... wish me luck!!

9.26.2008

Boo Tri-fold paper bag tutorial... and a challenge!!

This month, it was my turn to teach a make-n-take for the Gardner Stamp Club that meets at the library. Patti wanted to do the Fold Over Treat Envelope that is in the back of the TAC catty [though she doesn't remember saying that... silly Patti!], so I chose to do a Christmas version. It's a wonderful little project that I'll be sharing with you in another post, but I needed the back-story for this post.
[can I get any wordier?... like you care about the back-story...]
Anyhoo, the treat envie only uses the top portion of a lunch sack, so I had a ton of these 'bag butts' left over and they really wanted to become something wonderful.
[wouldn't you want to if you were referred to as a butt?]... I digress...

Here's how I created my Boo Tri-fold Bag Card:
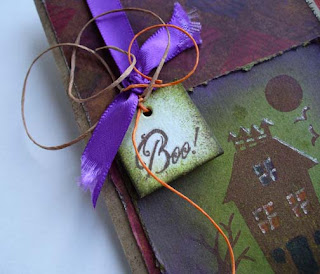
I lightly stippled Burnt Umber Palette ink around all of the edges and distressed the edges of the cardstock & DP (except for the inside piece, which I fixed on another one that I made!). I also stamped the paint splotches from So Splattered (retired) using B.U. I stamped the house image from Halloween Town in Coffee Bean Brilliance onto a square of green Penelope cardstock & sponged the edges w/ Hydrangea & Eggplant VersaMagic inks. I added a little color pencil to the windows & door and I then spritzed the square with Olive Glimmer Mist... OMG... freakin' awesome stuff! My friend, Cindy, had given me this for Christmas last year and I just now used it... WTH? None of the photos capture the true awesomeness of this stuff... you'll just have to trust me ;)... I sped up the drying time with my heat gun (so impatient) and then edged the window panes, part of the roof & tree, and the birds w/ a Stardust Glitter Pen (you know, to look like the moon is shining on it). Added a chipboard tag from TAC's Essential Elements, after grunging it up a bit & stamping the Boo!, with some Scrapper's Floss & tied it to some purple ribbon I had in my stash.

Inside, I stamped the skull from Halloween Town, in the same two purple VersaMagic colors above, onto the green Penelope cardstock and then layered it (sorta) onto an orange Penelope CS. Highlighted a bit with the glitter pen again!
And then on the VERY inside, glued a piece of Penelope DP to span across a fold and stamped the sentiment (retired: Boo Bash) at the bottom.

I had a fun time with this... no need to be pristine or perfect with it... the grungier the better!

What do you think?! Me likey... again!

Hey! Let's do another challenge!!
I want to see some butts... paper bag butts that is! ;) Your mission is to create something with a paper lunch bag butt... do you accept? Leave a comment and link it up!!!!
I've had a few people ask how big my bag butt is... the other project required 4-1/4" to be cut off the top of the sack, so mine is whatever is leftover from that!

9.24.2008

Hello Spring?

I've got two projects for you today! These were done several months ago for the Paper Wings DT, so they are pretty springy feeling :)

The first one is an all occasion card.

Flying to New Heights supplies (all from TAC):
Stamps: Spring Dream
Paper: Mulberry Meadow SWIC & Cardstock (retired)
Ink: Burnt Umber, Landscape, Jardin Moss, Cognac, Raw Sienna, and Lavender Sachet Palettes and Aegean Blue VersaMagic
Other: TAC's Hemingway Ribbon, Stardust Glitter pen

The second one is a 6x9 scrapbook page of my baby girl, Heidi [yes, I know, she IS the cutest... well, it's a tie between her & Thor!].

Enjoy the Moment, Heidi supplies (all from TAC):
Stamps: Spring Dream, It's the Little Things (retired), Date Disks, My Favorites (retired)
Paper: Mimi SWIC & Cardstock

Ink: Burnt Umber, Landscape, Jardin Moss, Cognac, Raw Sienna, Bordeaux, Chartreuse, Noir and Belle Rose Palettes and White StazOn
Other: color pencils & Gamasol, Stickles


What do you think?

9.21.2008

little miss scrappy scrapperson...

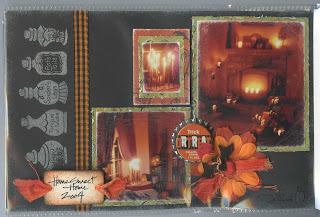
I actually completed a little scrappin' yesterday!! I'm definitely NOT a speed scrapper! It takes me forever to finish a page [just ask Cindy or Laurie!]. I'm working on a 8.5x5.5 Halloween album. I'm one that includes blurry pictures in her albums... that adds an extra creepy touch to things, I think. Here's what I've finished so far [Oh! And I'm not showing the completed page 2 because I don't like it... I'm just showing a small element from it instead!]. Sorry about the reflection off of the page protectors... it's such a pain to get the pages in & out, that I just scanned those little buggers!!

Cover:
Page 1:
Page 2 (sort of): ink on GrungeBoard
Page 3:
Page 4:
Page 5:
Page 6:

I LOVE the cover, and my two favorite pages so far are # 5 & #6. I used TAC's So Splattered & Spring Dream, and the potion bottle stamp is one from my friend, Laurie... I can't remember the name of the manufacturer. And there are a TON of different companies' products that I used to embellish with... Little Yellow Bicycle, Making Memories, etc. I'll try to look those up later. If there is something that you REALLY want to know, just email me and I'll find out what the name & company is... sorry about the lame text in this post... I'm tired and just want to go watch True Blood on HBO...
WHAT DO YOU THINK??

9.19.2008

Muhwah ah ah ah ah... [insert creepy background music here]

Halloweenie time again! I had soooooooo much fun creating the Leggy Witch card, that I tried another brayer / sponging project. This creepy little landscape uses only two different stamp sets, but several ink colors!!

I used a torn edge of paper to create the horizon line. I taped down that paper & then a punched circle over the moon to mask. I brayered Reflection Blue, then Prussian Blue, and finally Violette to create the sky. I removed the masks and brayered Chartrueuse over the grass area. I went back and sponged Landscape for more depth. I then used the reverse of the circle punched paper and sponged Sunflower & Raw Siena for the moon.

Using Landscape, Jardin Moss, Noir, and Violette inks, I stamped various images from Fresh Air Favorites at bottom and around right edge to create foliage. I used Graphite Black Brilliance and stamped a tree from Love and Laughter closest to the moon and then stamped another one, without re-inking, next to it. I stamped a third after re-inking and stamping off lightly.
To finish the scene, I used Fantastix and Landscape to shade the horizon and grass area around tree trunks. I sponged Jardin Moss & Violette around edges at grass area, and Noir around sky & moon.
I then matted it on TAC's Olive cardstock after running around the edge with a Cutter Bee Bug & distressing the edges. I used the dark navy from the Bazzill Monochromatic Blue cardstock pack for the card base.

Done!
What do you think? Me likey!!

9.18.2008

Loser... [but a pretty one!]

Real quick post tonight! I've got to figure out what I'm going to be working on this Saturday at a 12 hour crop in Topeka. I always take WAY too much stuff than what I use, but you just never know what you'll be in the mood to work on, ya' know? I've never been one to really plan my pages prior to working on them.

On to the fun stuff:


Here is a recent TAC contest loser, but I just love it. So pink and so girly! Clean, simple and the focus is on the stamps instead of pattern paper.


Curlique Butterfly card supplies:

Stamps: Cute Curliques, Butterfly Bits
Paper: Bazzill Monochromatic Reds
Ink: Toile Pink & Belle Rose Palettes

Other: pop dots


What do you think??

9.16.2008

A triple QUICKIE and something new ;)

I haven't had much time lately, so here are three quickies ;)

All of them have been created with retired TAC stamps and paper, but I've got to use them sometime!! There's really not a lot of stamping (that's why they were done so quick!), but I've been told that not EVERYTHING you make has to take forever to get the sentiment across... "if I made it, it matters" kind of thinking... you know, from the heart & NOT Hallmark!

Hocus Kitty, Gimme Candy, and Hangin' Spideys supplies:
Stamps: Hocus Pocus, Boo Bash, (can't remember which set 'gimme' came from)
Paper: Simply Spooky, Bazzill Mono Purples, misc. black & white CS
Ink: Noir, Landscape, & Orangerie Palettes, Brilliance Moonlight White
Bling: Orange Peel Stickles
Other: distresser, pop dots, & hydra sponge
Here's something new: I've started the

Random Mail Stamp Challenge!

Look at my sidebar for details & to see who has accepted the challenge so far. Kim is the first and the challenge JUST started this week, so I can't wait to see it really get going! Check back often, because I will be updating the link list whenever someone else has accepted the challenge!!

9.14.2008

A new card...

and it's NOT a Halloweenie one!!

[GASP!]

Yes, I feel fine... I'm not sick, well... I mean... uh... I don't have a cold or anything.

What, pray tell, is up with that? Well, someone asked me if I do anything OTHER than Halloween stuff... the answer is... why, yes... yes I do! Had it been someone I knew very well, [ie: Cindy or Laurie] I would have followed that sentence up with a "bi-yatch", but, I kept it a little low key instead [ big grin :) ] I tend to tone things down a bit on this blog... probably to keep the fact that I really am a nut job, a secret. [ wink wink ;) ]

Why would I do that? That, my friends, is the question of the day.

But back to the fun stuff! TAC's SWIC (Soar With It Collection) papers always have a cut-off strip at the bottom that shows the color palette of the whole paper pack...

[how's that for switching gears from one subject to another?! whiplash?]

... Each collection has a different swatch style, and the Hemingway SWIC swatch reminds me of rain drops, or tear drops. I had cut this off and it was on my table, so I just had to use it. Hence, the Miss You Hemingway card.


Miss You Hemingway card supplies:
Stamps: Swirlies & Trendy Greetings
Paper: Hemingway SWIC & Cardstock
Ink: VersaMark, Moonlight White Brilliance, Burnt Umber Palette
Other: pop dots


What do you think? FAR simpler and plain compared to the last post, but, hey... that's just how I roll. :)

9.12.2008

Leggy Witch Card with a 'written' tutorial...

I abso-freakin'-lutely love this card!!! I've had the idea for the card for awhile and I finally just did it! I had a blast making it last night and could hardly wait for my work day to get over with today so I could share it. I used a couple of Michelle Zindorf's sponging and brayer techniques. She is amazing... a true artist!

The card front you see started out as being my 'sketch' piece to go off of and make templates, etc., but once I got started, I just kept going! So now I have to try to reproduce this again... yikes! I started out with White UltraSmooth 80# cardstock base. I hand sketched the moon & witch leg w/ a light lead pencil so I could figure out where to stamp the tree. Using the Coluzzle, I cut out a large circle from another piece of cardstock to use as my mask.

First, I placed the negative over my base and started sponging the moon with Sunflower and then Raw Sienna at the edges. I removed the mask and lightly sponged more Sunflower around the moon to create a haziness. I then placed the circle over the moon and a piece of cardstock at the horizon line, covering the grass area. I brayered Beaux Arts Blue around sky edges, fading in toward moon, and followed up w/ sponging to even out the color. I repeated this step using Violette. I ran the brayer across the moon (without re-inking it) to create the thin cloud lines and add to the haziness.

For the grass area, I masked off the sky half of the base and sponged Chartreuse and then Landscape, fading inward. I used a Tombow marker to create the horizon line and then heavily sponged Landscape around tree trunk base. I stamped two different images from Fresh Air Favorites to create creepy grass/weeds... I used Landscape and rolled in Charcoal at edges. Finished up by sponging edges of grass area with Violette.

Using Noir, I stamped 'sentiment' & date with Ecclectic Alpha (retired). I traced over portions w/ Stardust Glitter Pen. Next, I used Fantastix & 'colored in' the witch leg with Noir on the base. I did this so that it would be dark under the popped up leg element... it reads like a shadow.

For the Witch leg: on scrap of White UltraSmooth, I used the journal lines from a retired GWP from a year ago to create the striped stocking and shaded w/ Fantastix, alternating between Noir & a mixture of Orangerie & Cognac. Sponged edges in Noir. I cut out boot from black cardstock and highlighted with Brilliance Moonlight White. I assembled leg/boot and popped up on black pop dots.

Finally, I matted base on black and then adhered to charcoal card base (3.5"x8.5").

[insert heavy sigh and sound of popping knuckles]

Good grief... did I just write a freakin' novel?!

Anyway, I'm going to try to recreate this again this weekend, and I might try one with heat embossing the tree... I really like it now, kind of understated... I wonder if the shininess of the EP would look funny? We'll see.

Please leave me a comment and tell me what you think. And thanks for stopping by!

9.10.2008

Hostess Club Night and my babies...

Tonight was the first night of the new round of Stamp Club! I think everyone really enjoyed themselves... it's a nice time to catch up w/ family happenings, see new pictures of babies (my favorite!), and get a little stamping time in, too! Julie, one of the gals in the club, was a winner of TAC's Toodle Loo package giveaway (yeay!) and she brought the CUTEST little chipboard book/album she made... freakin' adorable. Yes, I'm an idiot and didn't think to take a picture, so hopefully she'll send me one (hint, hint).

I DID manage to take a photo of one of the projects the ladies did tonight... the Brewin' Dark Angel card that I had posted earlier! I switched up the colors this time, and I really like it! I love seeing how different each one is even though all the cards use the same elements. The photo really doesn't capture the great coloring everyone did!

Hopefully I'll be motivated to create something tomorrow night... I hope so!

In closing, I thought I'd share a couple of pics of MY babies, Heidi & Thor. They are THE cutest babies ever! [Heidi is the blonde, Thor is the redhead] Thor always has to have his nose covered, and Heidi tends to nap at the edge of the stairs.

9.08.2008

More Halloweenie-ness...

Here's the cool little something I was talking about last time. It is pretty cutesy for me, but I still like it :) I haven't decided what to do with it yet... here are the options:


#1. element on a scrapbook page
#2. cover to a mini-book, maybe bound with the BIA or ribbons (my favorite)
#3. door hanger (just add eyelet & ribbon with some Scrapper's Floss for good measure)
#4. make part of the flap to a notecard holder (I almost did this)
#5. element on card front (I think it's a bit heavy, but maybe not)
#6. tag for a Halloweenie goodie bag
#7. ornament for those that have Halloweenie trees
#8. perfect for one of those "I've been boo'd" neighborhood serial-treat-dropping-ding-dong-ditching deals...

...endless possibilities here, people!

The base is a medium-weight 4" round coaster (I have at least 80 of these puppies!), covered with some Bazzill cardstock (TAC's Mulberry Meadow), sponged and edged. I hand sketched and cut out the bat & cloud elements and used the Fantastix to shade the cloud, bat, and the shadow under the sentiment. I bent the wings of the bat upward and mounted it and the cloud on foam tape for dimension.

Batty Moon Coaster project supplies:
Stamps: Boo Bash (retired)
Paper: Mulberry Meadow yellow Bazzill, misc. black & white CS
Ink: Noir, Cognac, & Orangerie Palettes, Moonlight White Brilliance
Other: Fantastix, foam tape, hydra sponge

If you would like the template for the bat and cloud, just email me (see side bar upper right corner) your email address and as soon as I scan the template, I'll send it to everyone interested.

What do you think?

9.07.2008

Sunday, Sunday, Sunday...

No, you have not come upon a monster truck show, I just wanted to say that.
Anyway, how about another grown-up creepy card? I REALLY dig this one. I had a page left over from a Woodrowe Album Kit, and it is sized perfectly for a card front! I love the Woodrowe & Willoughby papers so much (my new favorites), that I HAD to make a Halloweenie card with one of them, right? And I used another image from Fresh Air Favorites... love that versatility!!

Creepy Willough card supplies:
Stamps: Fresh Air Favorites, Boo! & Happy Heart GWP's
Paper: Woodrowe Album Kit, Bazzill Mono Yellow-Greens, Mulberry Meadow c.s. (retired)
Ink: Noir & Burnt Umber Palettes
Bling: Copper eyelet, Scrapper's Floss
Other: edge distresser, paper piercer, foam tape, hydra sponge


I made up a very cool little something, and I'm debating whether or not to use it for my Paper Wings DT assignment, or show it here... I do have until the 21st for my homework... hmmm... we'll have to see.


What do you think?

9.06.2008

Tie one on [no, not like that, lush] and a challenge...

So here is a masculine card I did for Paper Wings DT for Father's Day... what's nice is that it can be so easily modified to fit any occasion. After sketching the pattern & cutting it out, I stamped on the tie with Artsy Elements. I then used a sponge and Fantastix for the shading, and popped it up with foam tape to give dimension.

Office Memo Tie card supplies:
Stamps: Artsy Elements, Office Memos, Tag Tidbits
Paper: Kamalaht (retired), tan & charcoal c.s.
Ink: Noir, Starry Night, & Moulin Rouge Palettes
Bling: retangle paper clip
Other: foam tape, hydra sponge, Fantastix, corner rounder

Guy cards are always a tough one, I think.


So how about a challenge?

Your mission, should you choose to accept it, will be to create a masculine card or scrappin' page using one or more elements of this card for inspiration. Leave a comment with a link to your creation posted on your blog and I'll post everyone's links next weekend.

So, are you up for it?

9.04.2008

Mojo returneth?

I think I got a little of it back late last night.
From the first moment I saw the Fresh Air Favorites stamp set, I knew I had to have it for Halloween... yes, I know *freak*. There are a couple of images in there that really look like you could creep-them-out with just the right color palette:

Stamps: Fresh Air Favorites, Boo! GWP, From the Heart GWP
Paper: DCWV purple, Bazzill Mono Yellow-Greens, black & white c.s.
Ink: Noir Palette, Moonlight White Brilliance
Other: edge distresser, paper piercer, pop dots, sanding block

I really like this one. It's almost got a creepy-elegance to it?! The second photo is more true-to-life colors.
What do you think?

9.03.2008

Have you seen my mojo... it seems to be missing...

Ok. A little warning here. My mojo is missing and I don't know where it could be. I shut myself in my studio last night and this is all I could muster. Also, the lighting stinks right now because it is rainy, so the photos look yellow from my dining room light. Ick.
It is supposed to be one of those illusion-type-things where the smaller individual stamps aren't supposed to be the focus, but the overall picture is what you're after. Does that make sense? I had these scrap pieces of Bazzill Monochromatics and had already cut out these cool scallop cards with my Nestibilities, and decided to put them together.

Stamps: Running Stitches (eyebrows & forehead), Mini Occasions (cat/eyes, pumpkins), All Season Swirls (hat/nose), Boo Bash (sentiment/teeth), So Splattered
Paper: Bazzill Monochromatics (Violets & Yellow-Oranges), black cardstock
Ink: Noir Palette, Brilliance Moonlight White
Other: Nestibilities, Fantastix (for shading), pop dot, foam tape, hydra sponge

Yes, I know... very creepy... but other than that, what do you think? Did I at least get the illusion working?